Already created a PlanetScale Postgres database? Jump straight to integration instructions.
- Creating a new Postgres database
- Cluster configuration options
- Connecting to your database
Prerequisites
Before you begin, make sure you have a PlanetScale account. After you create an account, you’ll be prompted to create a new organization, which is essentially a container for your databases, settings, and members. After creating your organization, it’s important to understand the relationship between databases, branches, and clusters.- Database: Your overall project (e.g., “my-ecommerce-app”)
- Branch: Isolated database deployments that provide you with separate environments for development and testing, as well as restoring from backups - learn more about branching
- Cluster: The underlying compute and storage infrastructure that powers each branch
Create a new database
- Dashboard
- CLI
Step 1: Navigate to database creation
Log in to your PlanetScale dashboard
Step 2: Choose database engine
On the database creation form, you’ll see two engine options:
- Vitess (MySQL-compatible)
- Postgres (PostgreSQL-compatible)
Step 3: Configure your database cluster
Database name: Enter a unique name for your database
This “name” is referenced in the PlanetScale Dashboard and APIs and not created as a logical database inside of Postgres.
Region: Choose the primary region where your database will be hosted. For the lowest latency, select a region near you or your application’s hosting location.
Cluster configuration: Select your preferred cluster size and CPU architecture
Step 4: Create the database cluster
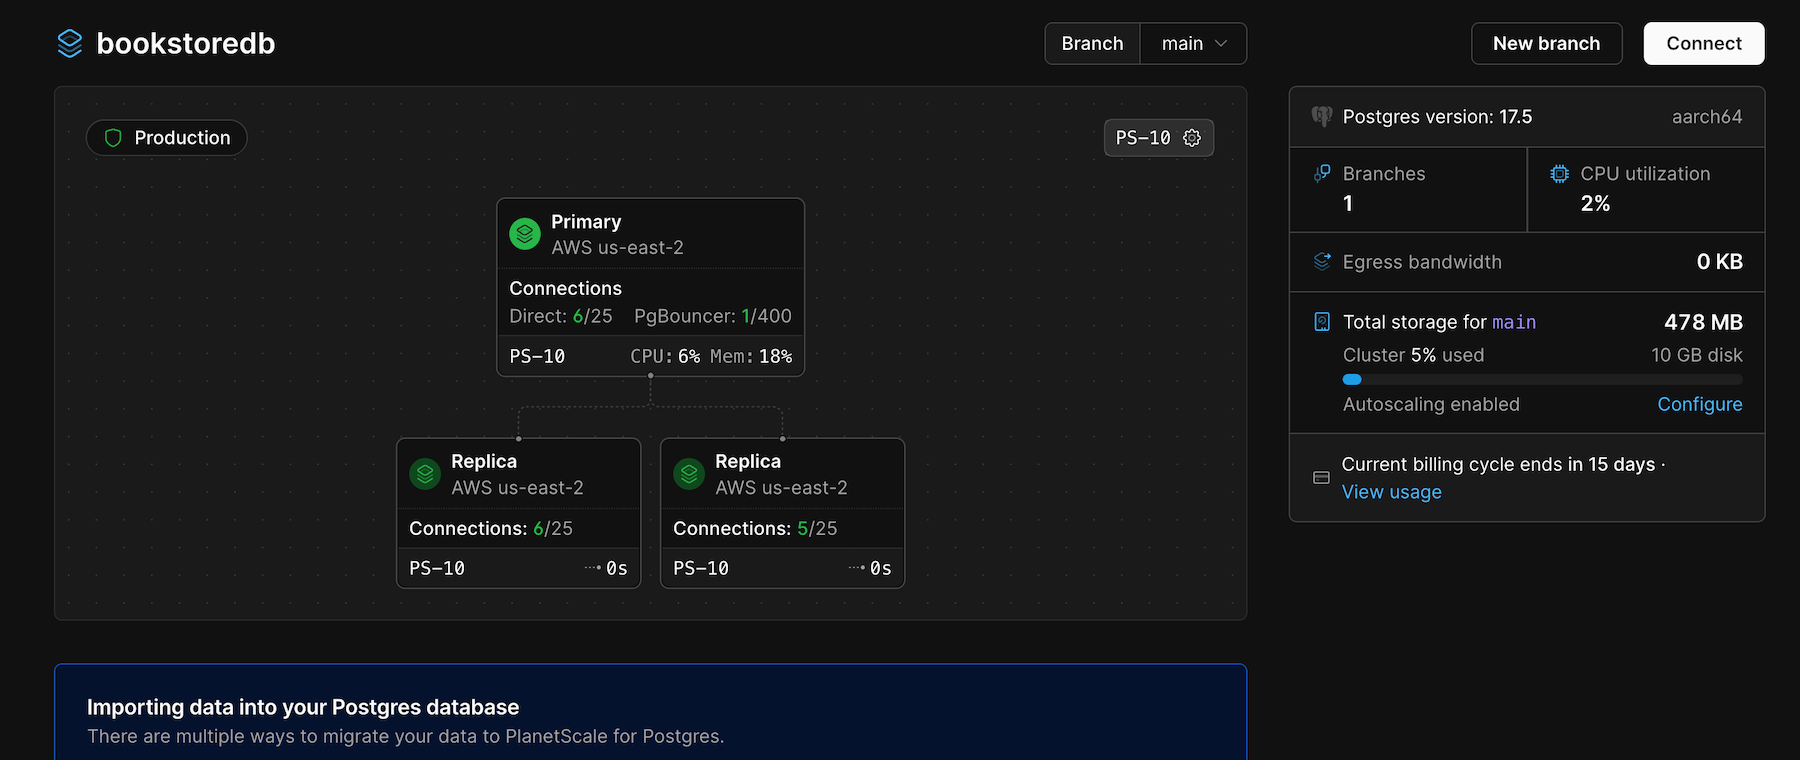
What happens during creation
When you create a Postgres database cluster, PlanetScale automatically:- Provisions a PostgreSQL cluster in your selected region
- Creates the initial
mainbranch - Prepopulates Postgres with required default databases
- Sets up monitoring and metrics collection
- Configures backup and high availability settings
Create credentials and connect
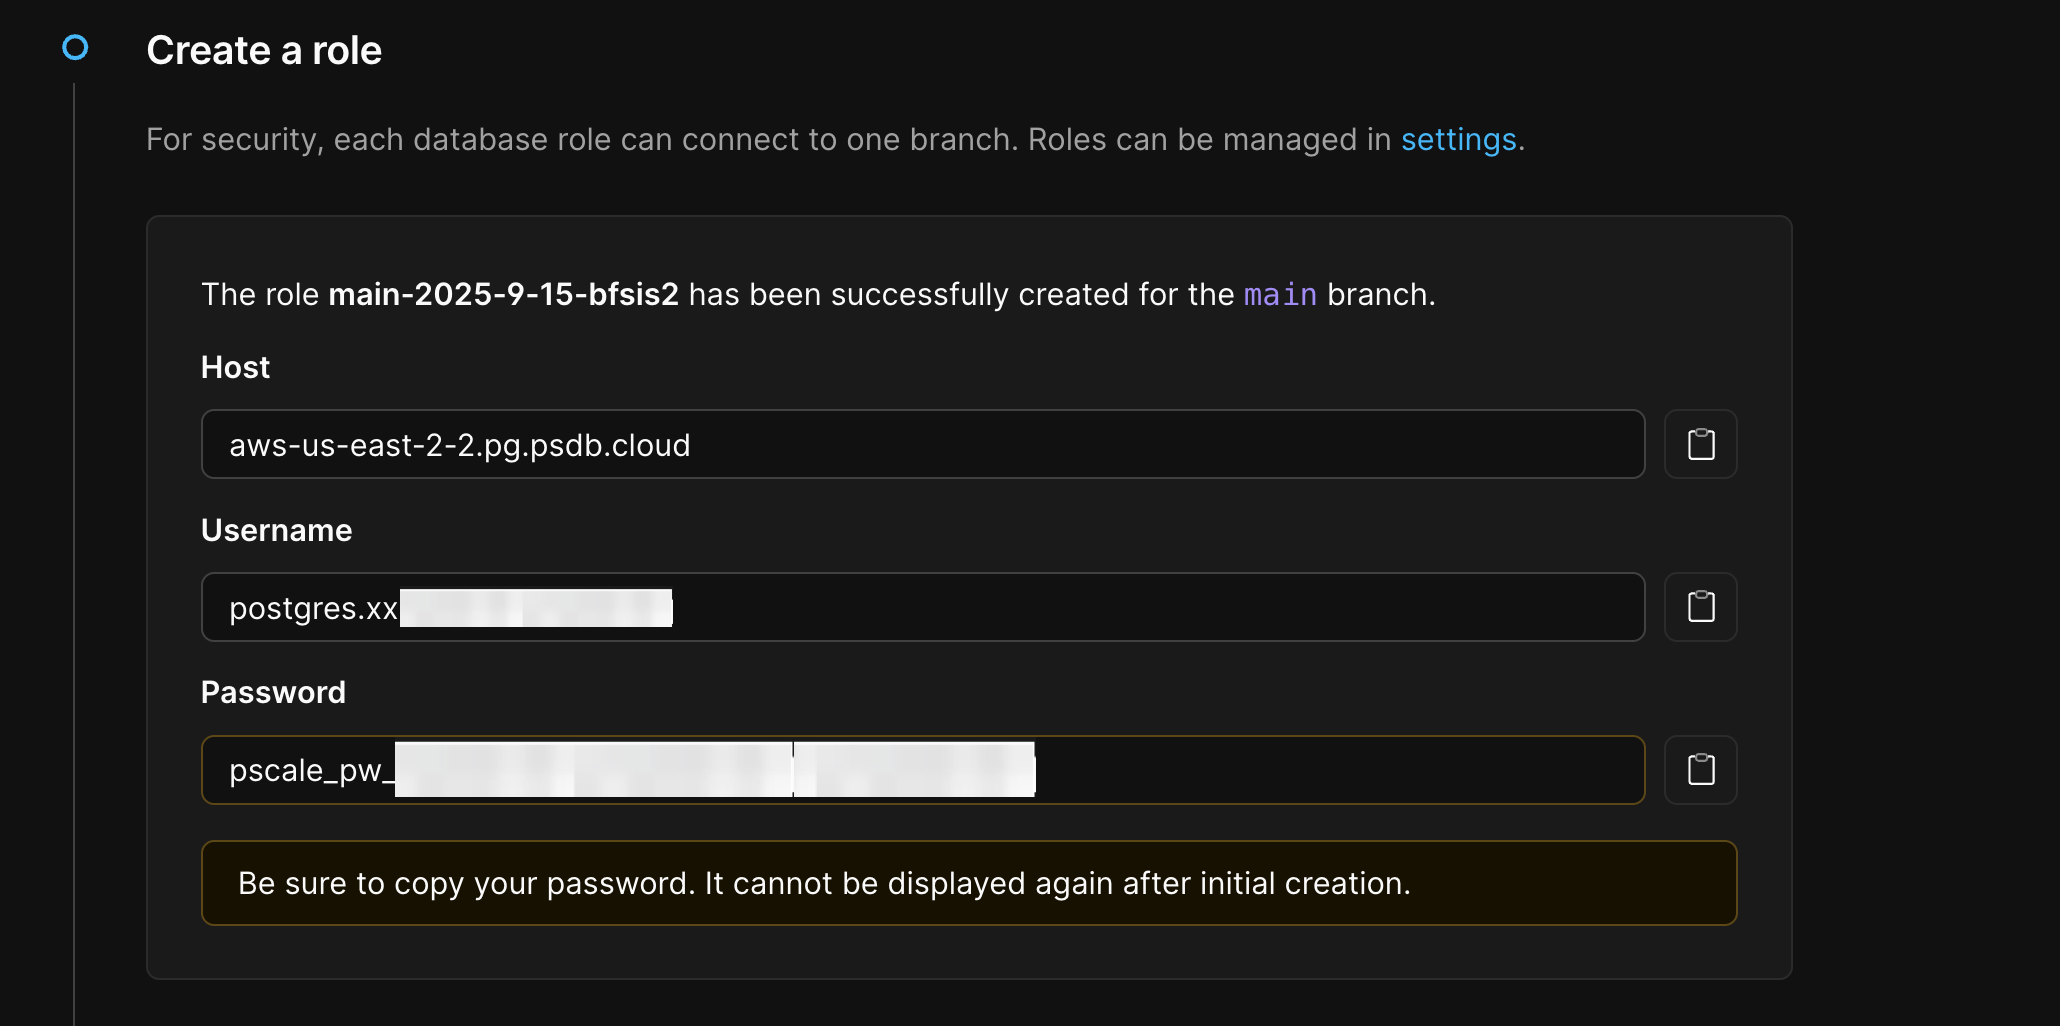
In this section you’ll create the “Default role” in your PlanetScale dashboard to create connection credentials for your database branch.The “Default role” is meant purely for administrative purposes. You can only create one and it has significant privileges for your database cluster and you should treat these credentials carefully. After completing this quickstart, it is strongly recommended that you create another role for your application use-cases.
- Dashboard
- CLI
Navigate to your database in the PlanetScale dashboard
You can generate connection strings under “How are you connecting?” for major languages, frameworks, and tools.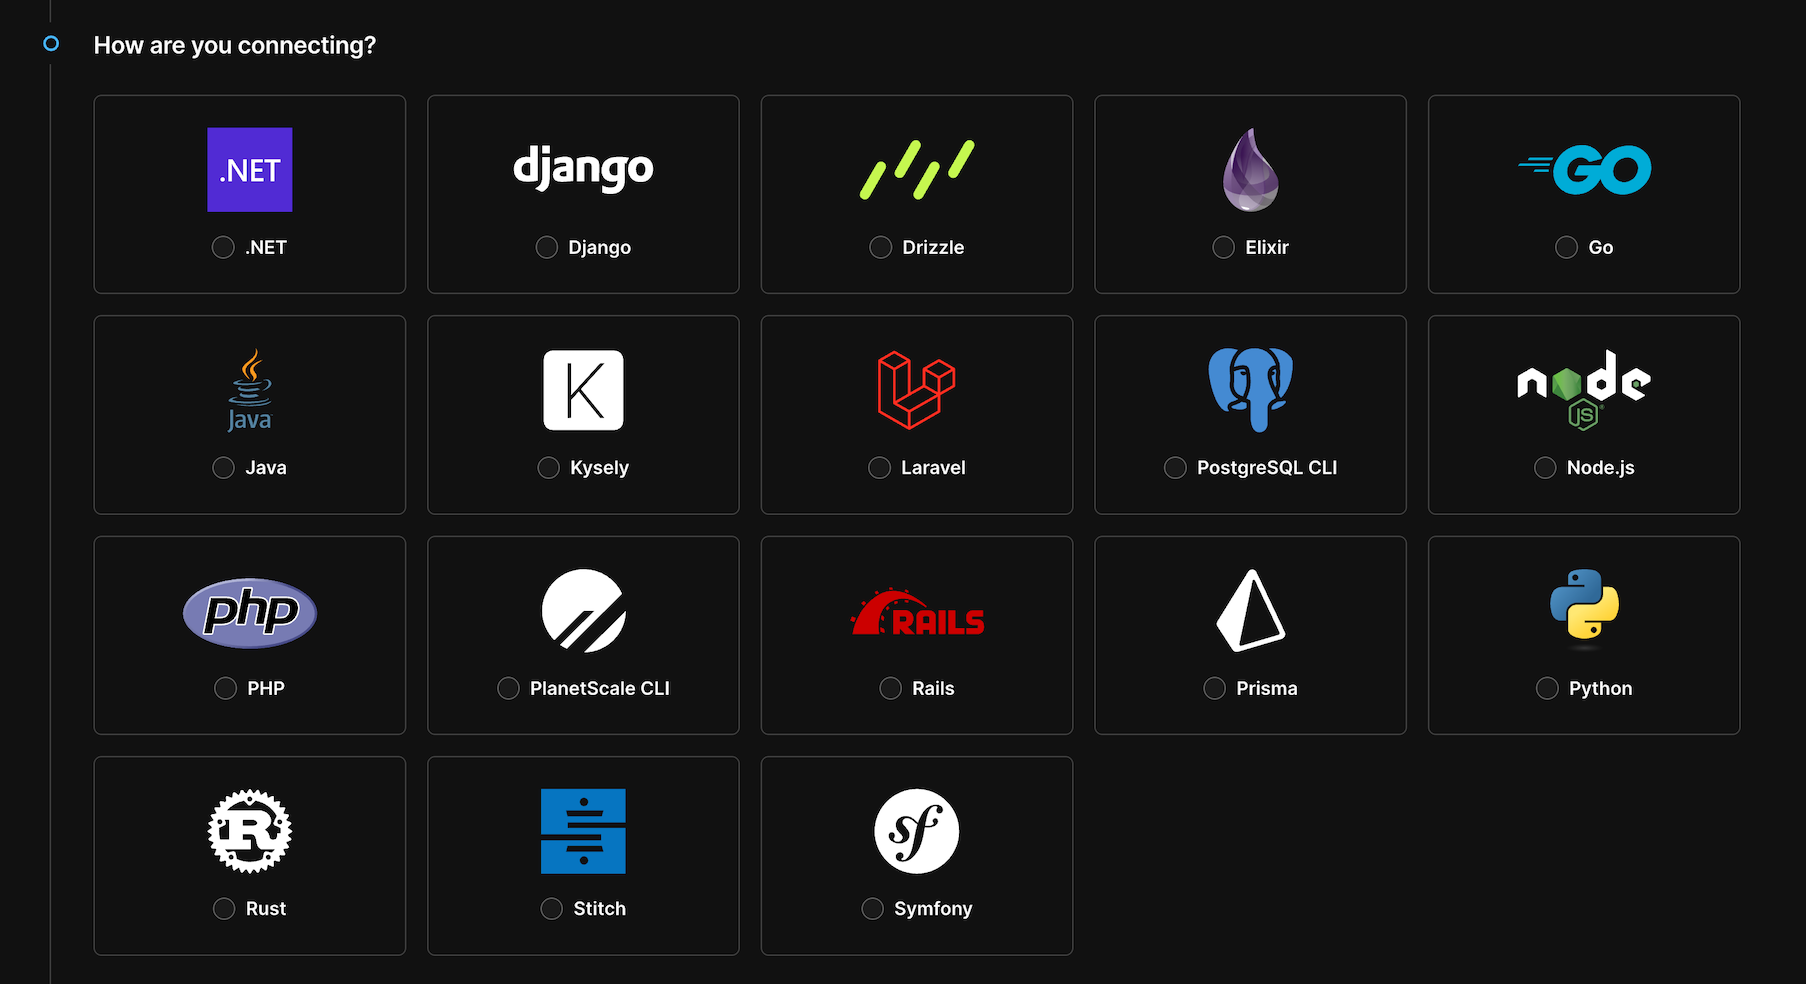
- Host: the DNS name of your database endpoint
- Username: automatically formatted for routing to the correct
branch - Password: A securely generated password
- Database:
postgres(default database) - Port:
5432(standard PostgreSQL port) or6432(for using PgBouncer)
Passwords are shown only once. If you lose your record of the password, you must reset the password.
Integrate with Kysely
Installation instructions vary depending on your choice of JavaScript runtime or framework. The following are general instructions for installing Drizzle and connecting to your database.Step 1: Install packages
Run the following to installkysely and pg:
Terminal
dotenv to load your credentials from an .env file for local development.
Terminal
Step 2: Add credentials to .env
For local development, you can place your credentials in a.env file. For production, we recommend setting your credentials as environment variables wherever your application is deployed.
Replace the placeholders below with the role credentials created in the previous section.
.env
PgBouncer
Port
6432 enables a lightweight connection pooler for PostgreSQL. This facilitates better performance when there are many simultaneous connections.Direct
Port
5432 connects directly to PostgreSQL. Total connections are limited by your cluster’s max_connections setting.Both connection types will disconnect when your database restarts or handles a failover scenario.
Step 3: Create a database connection
app.ts
db variable will depend on your choice of JavaScript runtime or framework.
For more information on using Kysely including creating schemas and performing queries, refer to their documentation.